Wednesday 29 October 2014

Falconry at Herstmonceux Castle

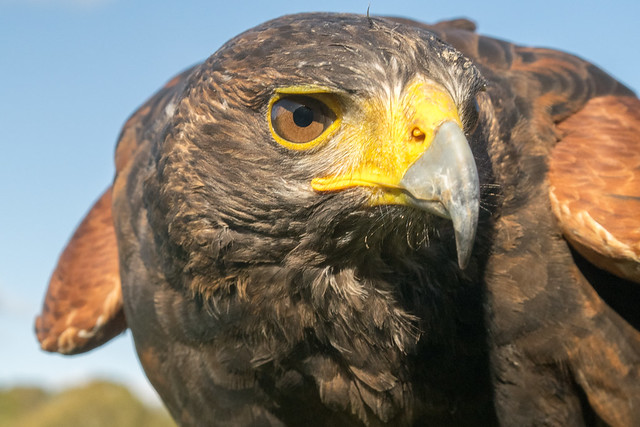
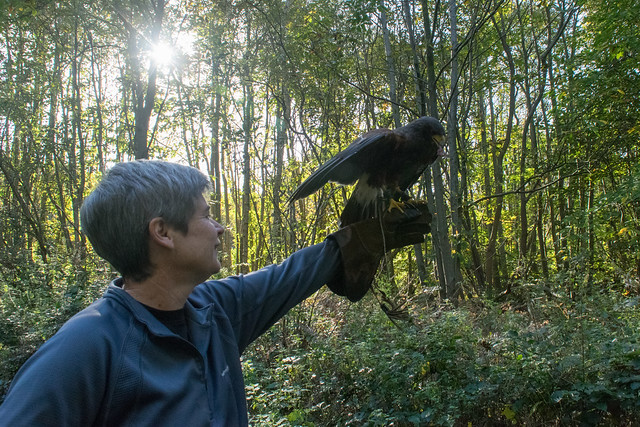
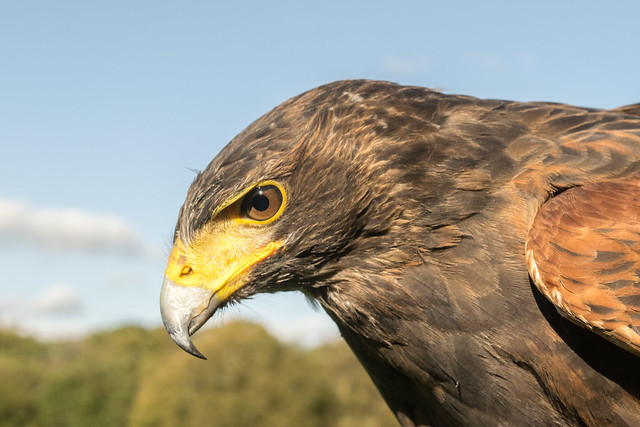
A few days ago Tracy and I had an amazing day out with raptors, hosted by Gerard of East Sussex Falconry at Herstmonceux Castle. Here's Ash the Harris Hawk, a beautiful bird:

DSC_2215

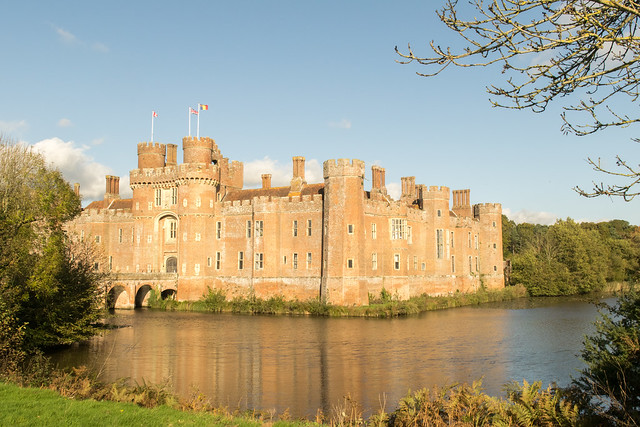
The castle was a great setting for flying the birds, with beautiful grounds and woodlands:
DSC_2196

DSC_2569

DSC_2283

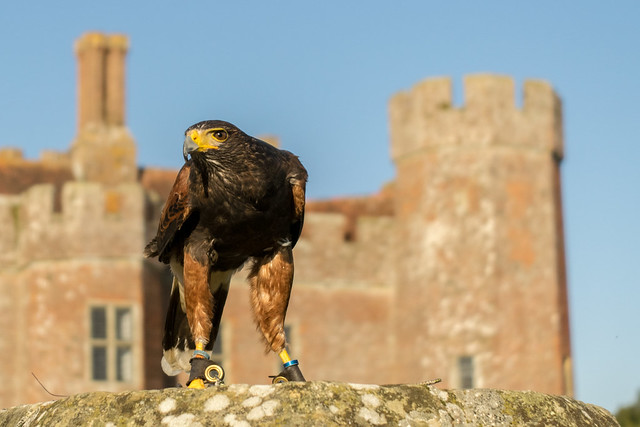
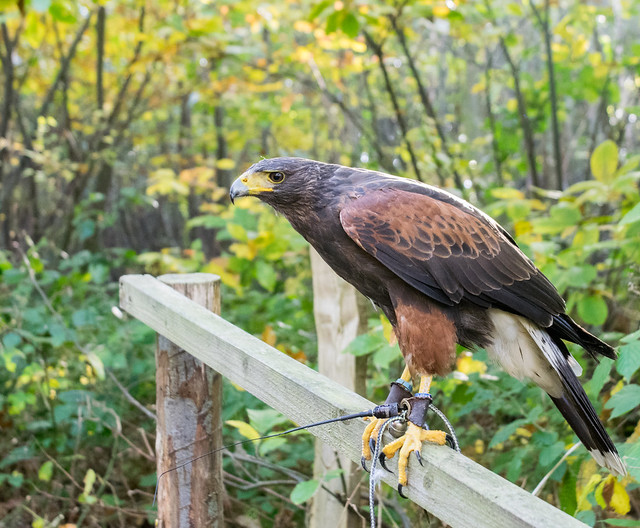
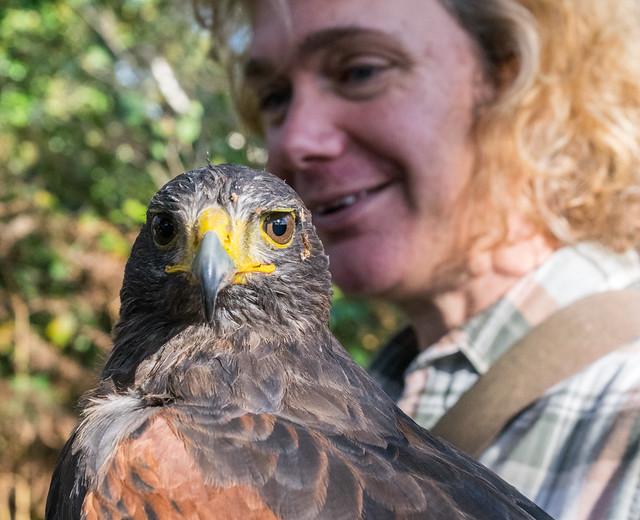
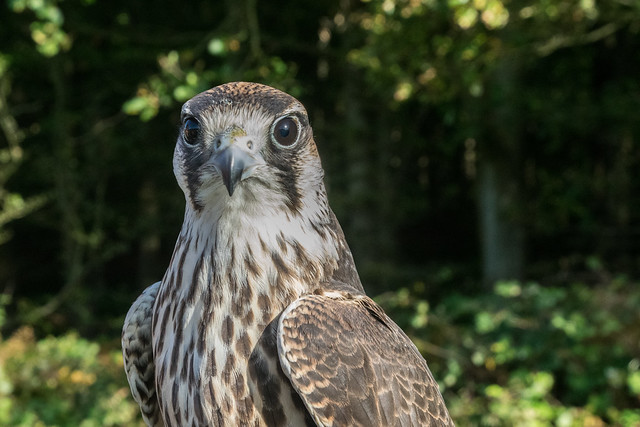
Here's Ash's brother, Cedar, posing in front of the castle:
DSC_2556

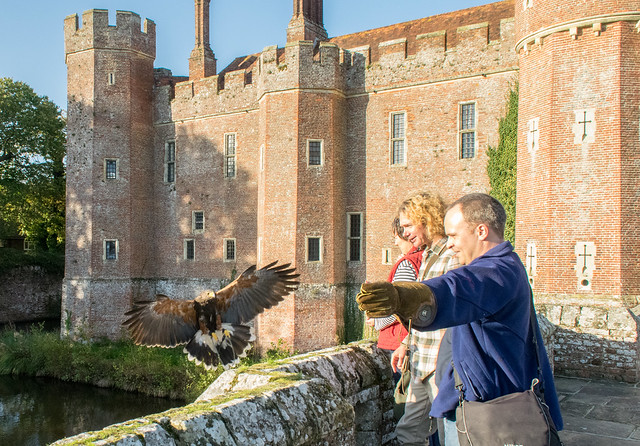
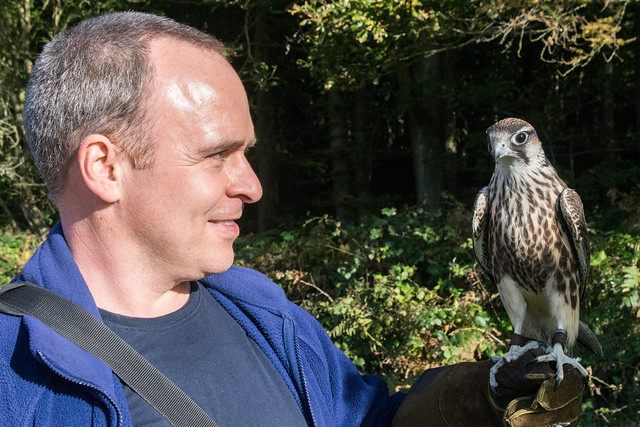
We spent some time with each of the Harris Hawks in the grounds, getting used to handling them and having them land on us:
DSC_2591

DSC_2547

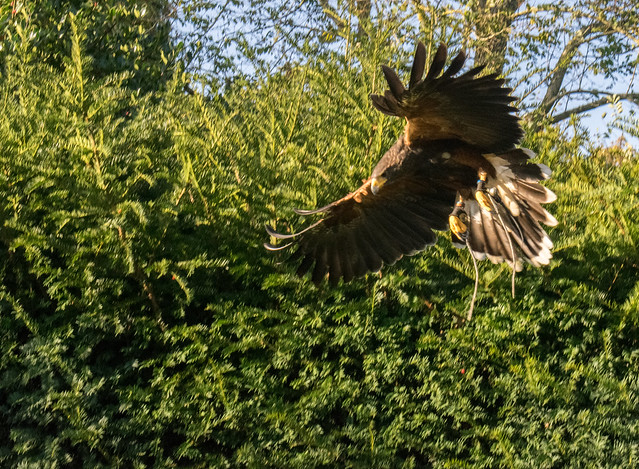
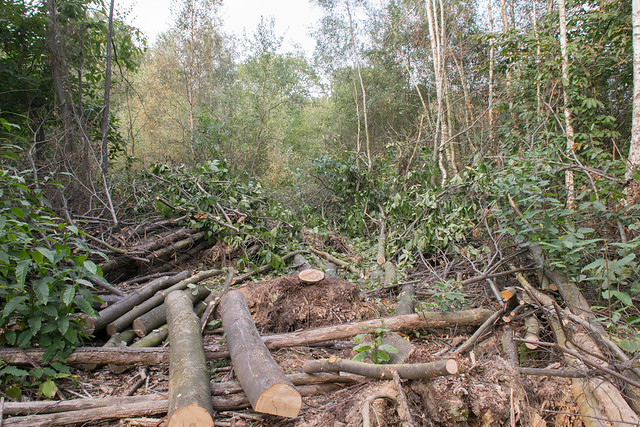
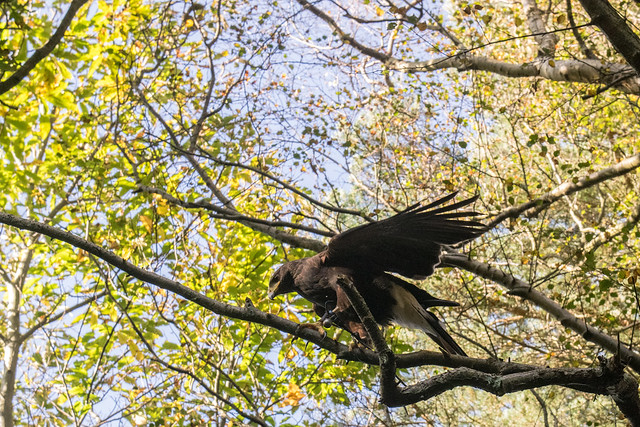
Then we moved into the woods, which is ideal territory for the hawks to hunt in:
DSC_2229

DSC_2237

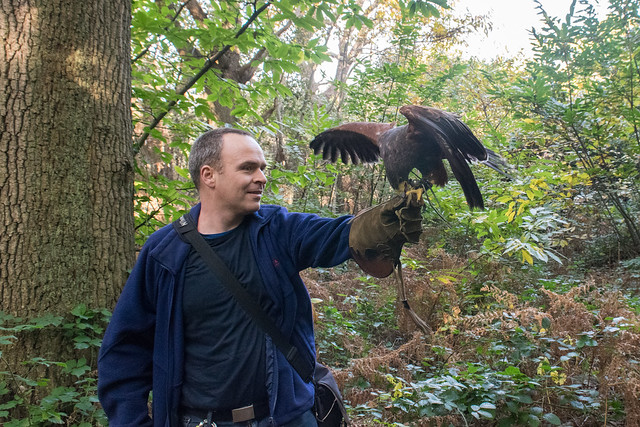
Plenty of other places to perch in the woods as well as our hands, so meat treats were definitely required to keep the birds with us.
DSC_2286

DSC_2251

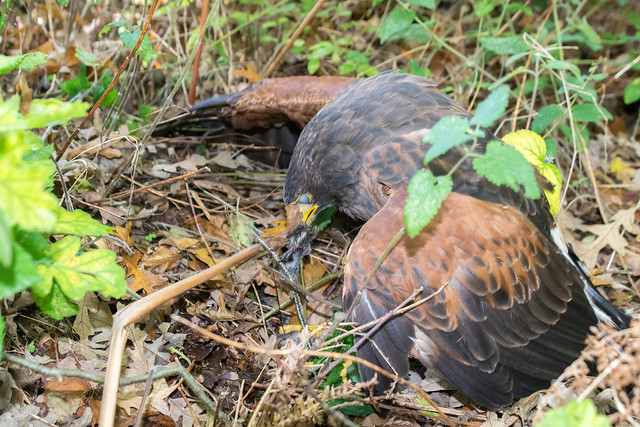
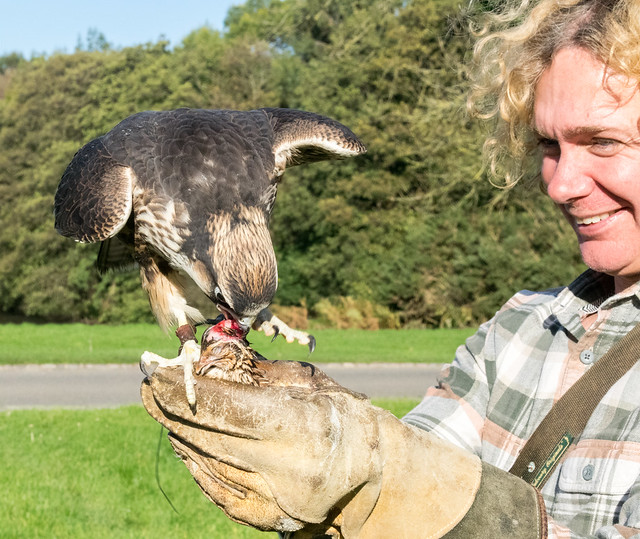
However, Ash did manage to catch a vole, some other kind of rodent and nearly got a hen pheasant as well! Here he is with one of his catches, and in the first photo you can see his nictitating membrane, caught by chance in the camera flash - this is like a third eyelid, but translucent so the bird can see through it.
DSC_2323

DSC_2328

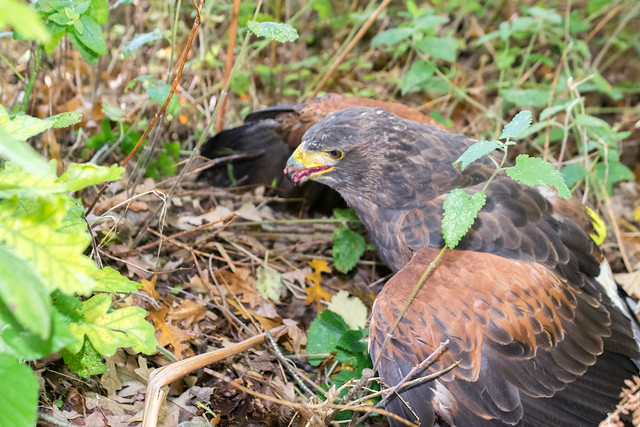
It was amazing watching them hunt - there was a big difference in speed compared to when they were flying to our hands for a treat, and in all cases we had no idea the prey was there until the bird went for it, having spotted his target from a significant distance.

Gerard explained the birds and their behaviour as we went along, and it was clear how well he knew the birds, and how much they trusted him too.
DSC_2345

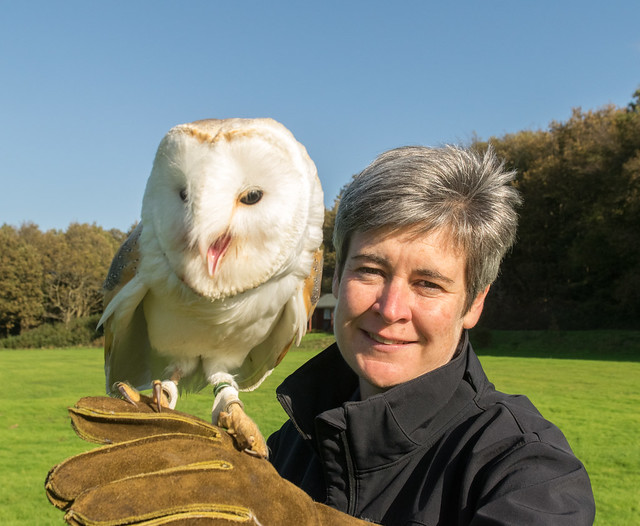
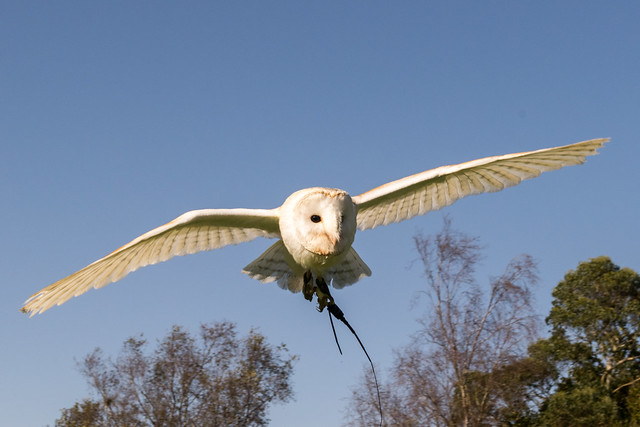
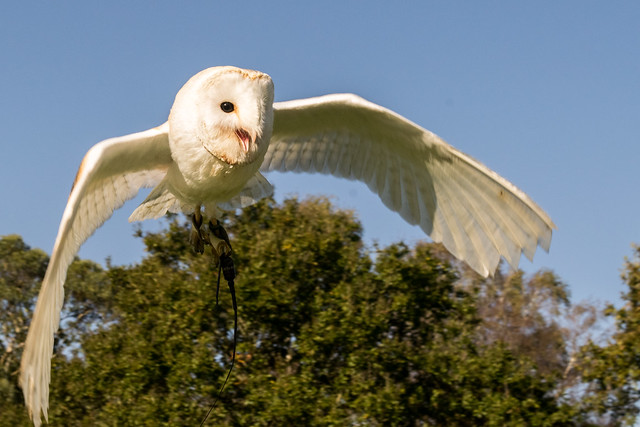
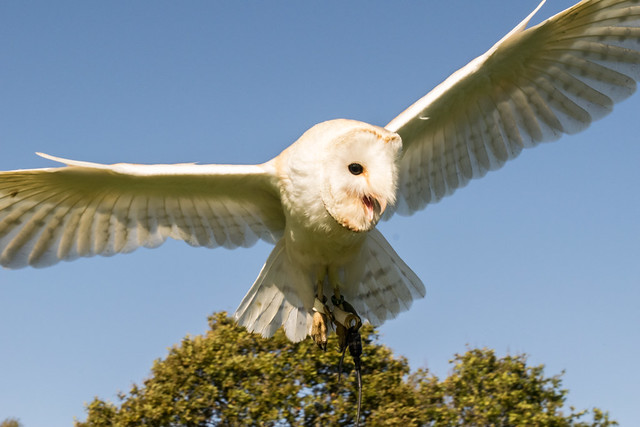
As well as flying the hawks, we also flew two owls. Here's Halo the Barn Owl:
DSC_2355

He was struggling a bit in the wind, and sometimes landed in slightly random places as a result!
DSC_2380

DSC_2394

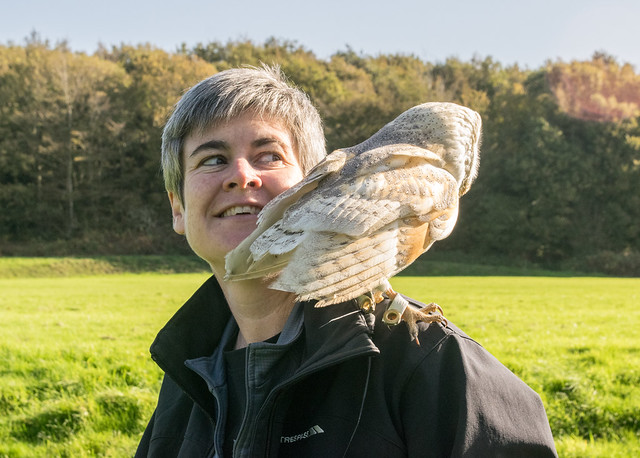
Tracy said her head was a bit sore after this! But I think it was worth it for the photo... :-)

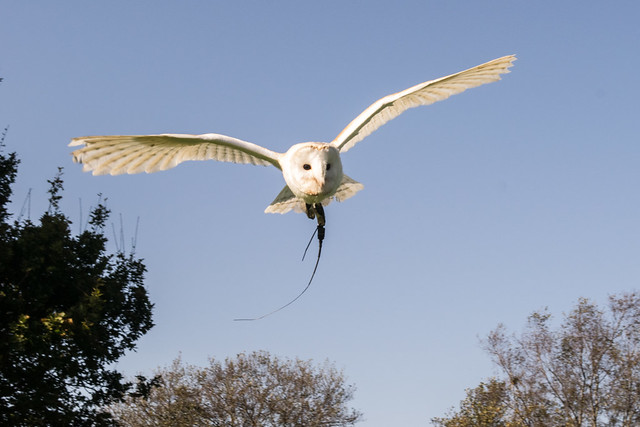
Halo also let me get some nice in-flight photos such as this sequence of him coming in to land:
DSC_2387

DSC_2388

DSC_2389

DSC_2391

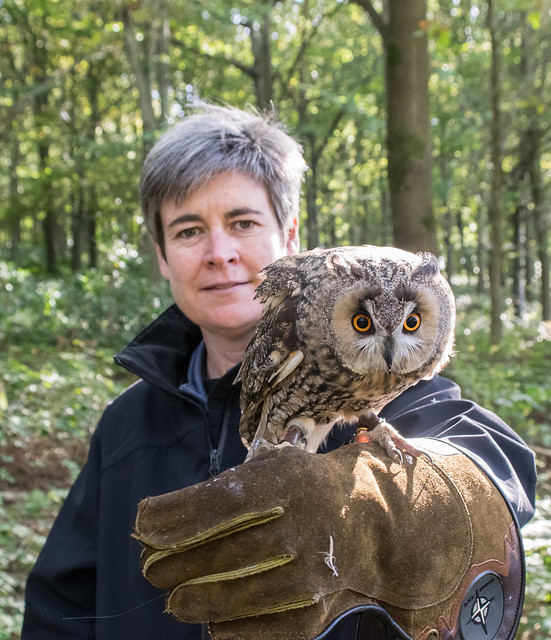
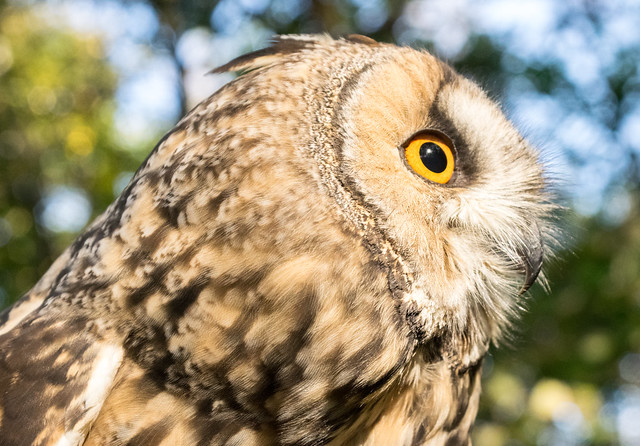
Next we met Bramble, a Long-eared Owl:
DSC_2408

DSC_2418

DSC_2435

DSC_2467

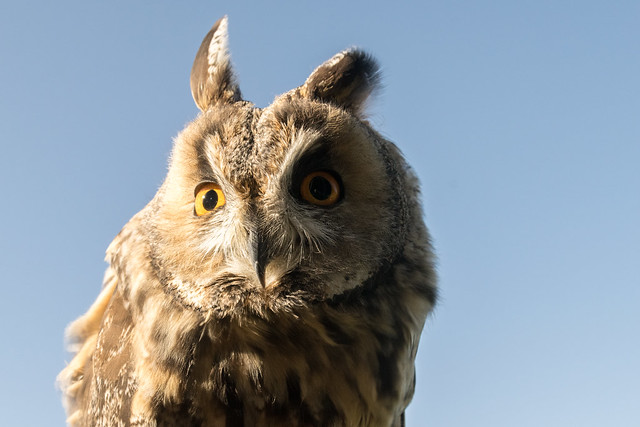
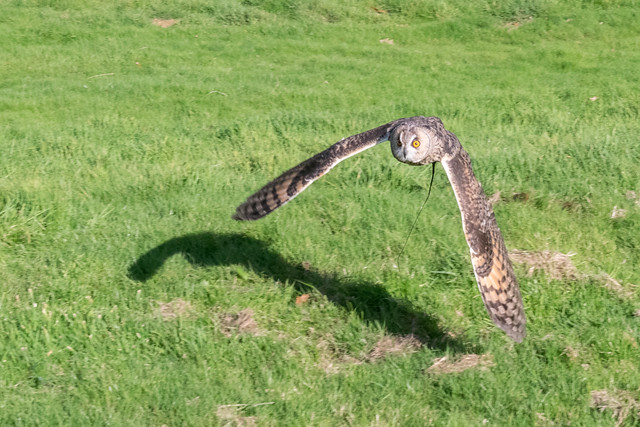
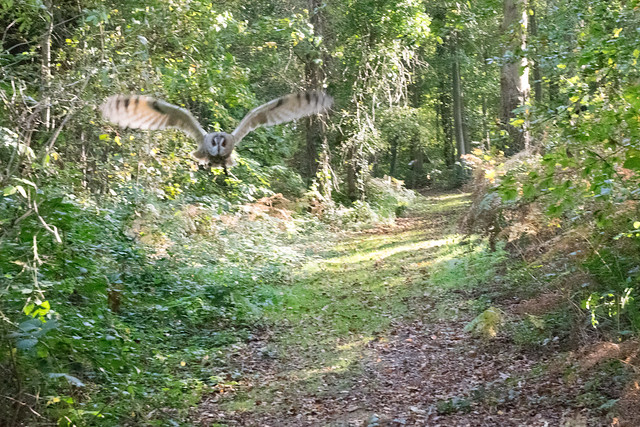
We took Bramble into the woods, where she impressed us with her silent fly-bys.
DSC_2438

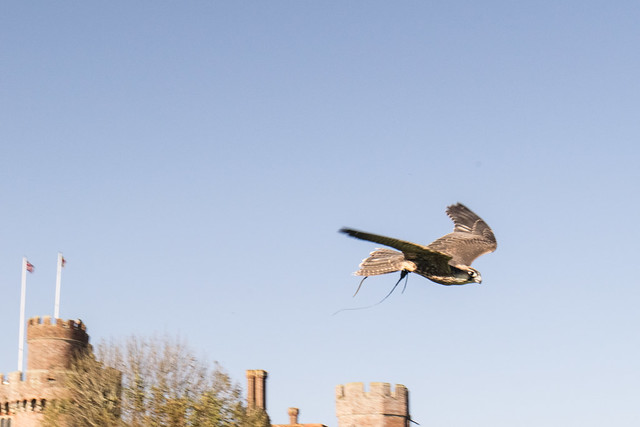
After the owls, it was time for us to meet a couple of falcons. First up was Neo, a Lanner Falcon:
DSC_2478

DSC_2485

He didn't sit with us for long, all he really wanted to do was fly!
DSC_2497

Gerard got him interested by twirling a lure round on a rope, which prompted some acrobatic flying from Neo!
DSC_2498

DSC_2500

DSC_2504

Before long he got hold of the lure, and took it to the ground to eat:
DSC_2507

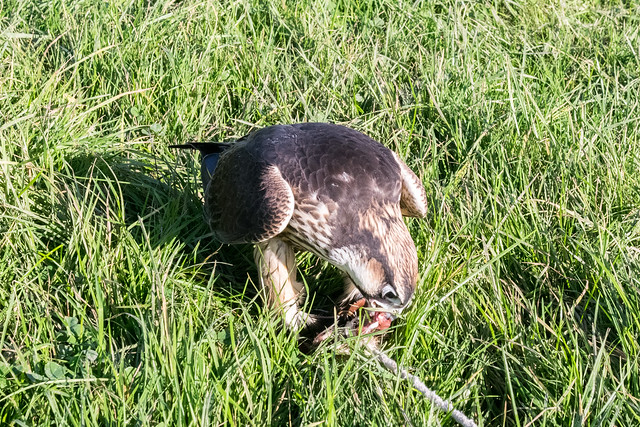
After which he got a Quail's head as a reward for his performance - slightly gruesome, but just what he wanted!
DSC_2511

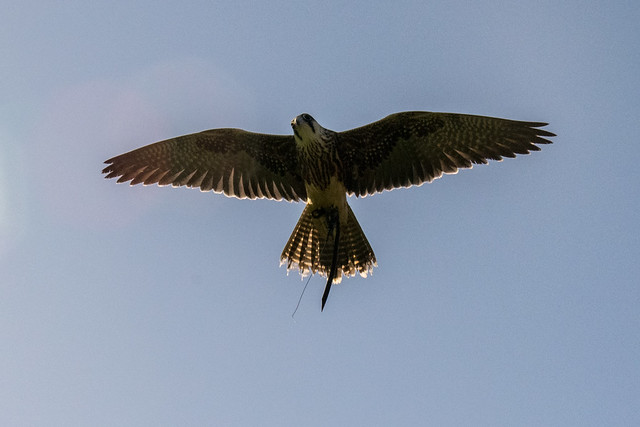
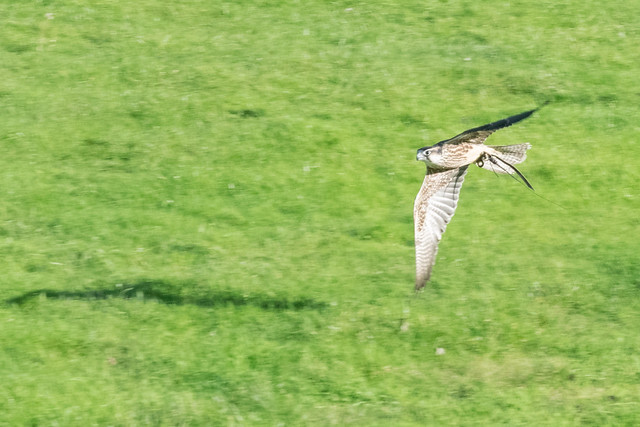
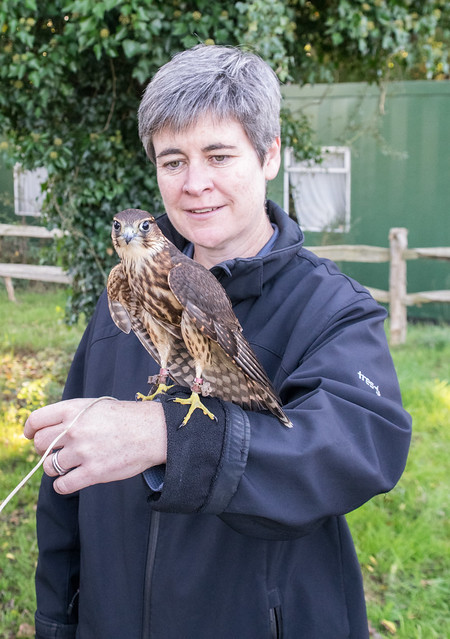
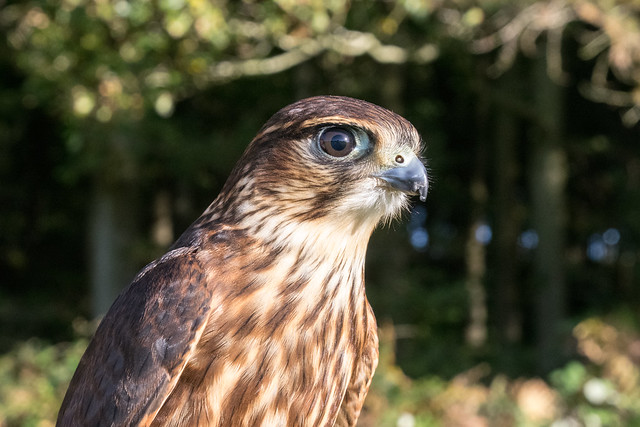
After Neo, we got to meet Atom, a Merlin - the smallest type of Falcon in the UK
DSC_2521

DSC_2513

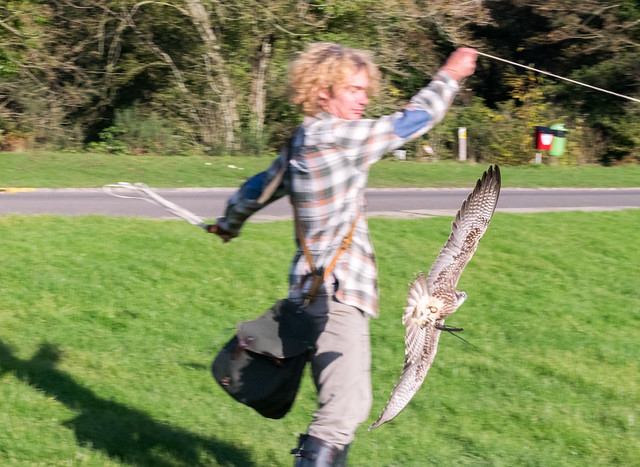
His challenge was to chase a lure being held up by this quad-copter drone!
DSC_2522

No problem for him though, he got straight in there!
DSC_2526

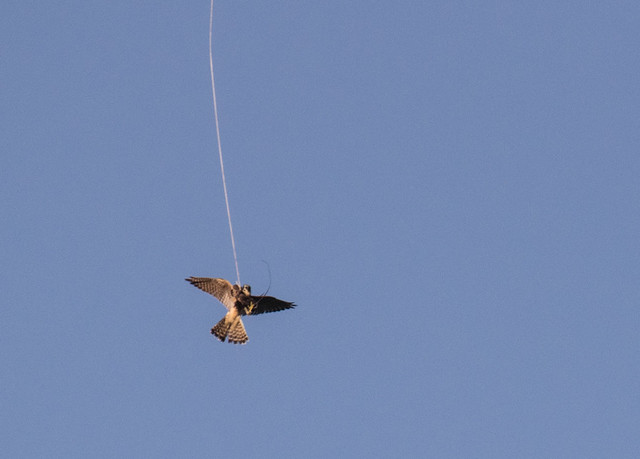
He brought the lure back to the ground to eat, and waited for us to catch up with him.
DSC_2533

All in all, an excellent day, and one I can recommend to anyone! Visit East Sussex Falconry to find out more...
DSC_2214

Also, I too quite a few more photos than the ones used in this blog, you can see them in a Flickr album here.

Mike

Click here to read the rest of this post.

Monday 20 October 2014

Making progress with coppicing

A good day today in the woods, yielding more than two cubic metres of split and stacked logs:

DSC_2176

I've cleared up most of the windblow now, and have been able to move on to actual felling. So this view from a few weeks ago:
DSC_2058

now looks like this:
DSC_2180

There's a few nice sweet chestnuts coming down now, thudding to the ground around me as the wind blows. I've not been eating them though, I've been planting them, hoping to fill in some of the gaps left by windblown trees that didn't recover.
DSC_2195

A few fungi are in evidence again now, as we've had some rain, such as this Fly Agaric, or Amanita Muscaria:
DSC_2183

Geese are brightening my day up too, it's always nice to watch them fly overhead - they head out one way in the morning and head back in the afternoon. I think they're going to the Rye Harbour Nature Reserve for the day, and coming back to a lake near the wood to sleep...
DSC_2186

Mike

Click here to read the rest of this post.

Tuesday 14 October 2014

Insulating the dormer roof

The latest stage of the gradual eco-refurbishment of our house was insulating the dormer roof. Here's a video about it, with some photos and an explanation below:


The dormer roof contained an inaccessible cavity, between the roof, the lounge ceiling and the bedroom wall (below the window). So the only way in was to make a hole in the wall...
DSC_2072

It wasn't the easiest place to work, and I needed a head torch at all times to see what I was doing:
2014-09-28 16.58.12

Here's how the cavity looked before I started, with no insulation whatsoever against the bedroom wall:
DSC_2078

And none over the lounge ceiling either:
DSC_2079

Worse still, there was a completely open gap between all the joists, running from the front to the back of the house between the ground and first floor:
DSC_2076

Consider that this space is ventilated by the soffit vents shown below, and you'll realise that the result on a windy day was cold air blowing above the lounge ceiling, making the whole downstairs of the house rather chilly!
DSC_2084

So, the first priority was to block up these gaps - it's a warm space, with the heat from the lounge below, so doesn't need ventilating. I used 50mm Ecotherm rigid insulation boards, made of polyisocyanurate, cut to size and then glued in place. I tapped a nail into the joist each side first, so I didn't end up pushing the board too far along the gap.
DSC_2141

Once each gap between the joists was sealed, I then put in 200mm of Knauf glass fibre insulation, made from recycled glass. I could have fitted a tiny bit more in before reaching the top of the joists, but 200mm was the closest fit available for the space I had:
DSC_2159

Up against the bedroom wall, I used the 50mm Ecotherm insulation boards again. It was quite a laborious process, measuring the spaces, coming out of the cavity, cutting several pieces to size, going back in again, using a sharp knife to trim the boards if they didn't quite fit, then glueing round the edges to make sure they didn't move.

A typical wood saw was OK for cutting the boards, but don't expect to use it for cutting wood ever again, as it will be blunted! A sharp bushcraft knife did a great job of final trimming to fit, and remained surprisingly sharp throughout.
DSC_2154

Here's how it looked once it was all done:
DSC_2157

When I made the hole in the plasterboard to get through the wall, I'd enlarged it to the edges of the wood behind it at the sides and top, but not at the bottom as I wanted to keep clear of the skirting board. So once I was done I screwed in a new piece of wood there:
DSC_2162

On the other side, I then trimmed the plasterboard back to leave a margin, and found some bits of wood to use as trim round the edge. I then added a draught-
proofing strip on the margin inside the plasterboard.
DSC_2163

After that I cut out a plywood panel to fit the gap, and glued/screwed a 50mm insulation board on the back of it:
DSC_2165

Finally, the plywood is held in place be a couple of bolts. I'd wondered about using hinges, but decided it wasn't worth the bother and would also have made it harder to get a tight-fitting insulation board on the back.
DSC_2167

It just needs a lick of paint now to finish the job! Oh, and I need to do the same at the other side of the house.... well, at least just doing one side stopped the draught above the lounge ceiling!

The ground floor of the house is now much warmer - the difference was immediately noticeable! I'd strongly recommend anyone with an uninsulated cavity like this to investigate doing something similar.

Mike

Related posts:

Click here to read the rest of this post.